I love creating free content full of tips for my readers, you. I don't accept paid sponsorships, my opinion is my own, but if you find my recommendations helpful and you end up buying something you like through one of my links, I could earn a commission at no extra cost to you. Learn more
For those on a budget, a high-quality dust collection system might not always be an option. That does not mean you should compromise the quality of air in your workshop or store, whether it is big or small. Since you will most likely be spending a lot of time in the room, air purity is an essential factor to consider.
You will be happy to know that if you cannot afford a dust collection system, you can build one yourself. It might seem intimidating at first, but surprisingly building your own dust collection system is not a very challenging project. With this, you will not have to worry about dust buildup in the room anytime soon.
 For people with allergic problems, a dusty room is a dealbreaker. Even if you have no issues with allergies, a dusty room will eventually take its toll on your health. But with our handy and easy-to-follow guidelines, you do not need to expose yourself to that sort of health risk.
In this article, we will take a look at a cheap and effective way to build a dust collection system that can elevate the air quality in your room and keep it dust-free.
For people with allergic problems, a dusty room is a dealbreaker. Even if you have no issues with allergies, a dusty room will eventually take its toll on your health. But with our handy and easy-to-follow guidelines, you do not need to expose yourself to that sort of health risk.
In this article, we will take a look at a cheap and effective way to build a dust collection system that can elevate the air quality in your room and keep it dust-free.
Things You Need to Build a Dust Collection System
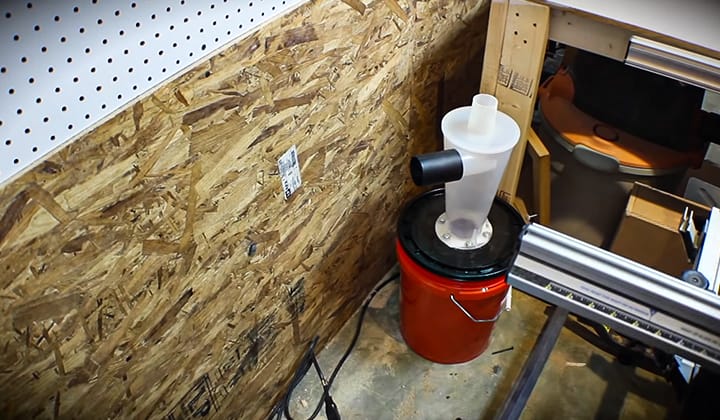
No matter if your shop is big or small, dust management is an inevitable task that you must do. Before we start getting into the steps, you need to gather a few supplies. Do not worry; most of the items on the list are quite easy to get. Here are the things you need to get started on this project.- A strong 5 gallon plastic bucket with a tight fitted lid.
- A 2.5 inch PVC pipe with a 45-degree angle
- A 2.5 inch PVC pipe with a 90-degree angle
- A 2.5 inch to 1.75-inch coupler
- Two hoses
- Four small screws
- Industrial-grade adhesive
- Power drill
- Hot glue
How to Build a Dust Collection System
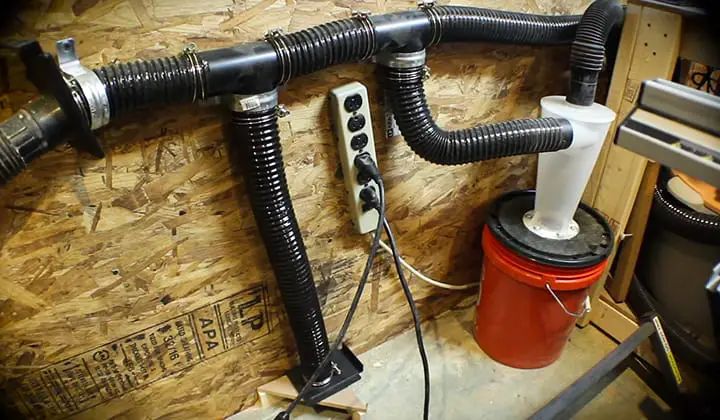
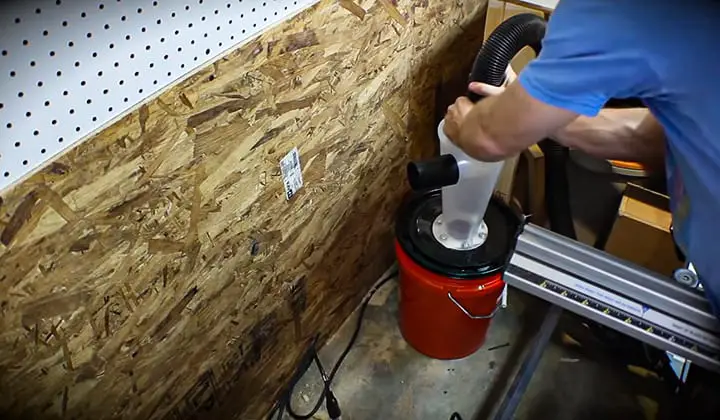
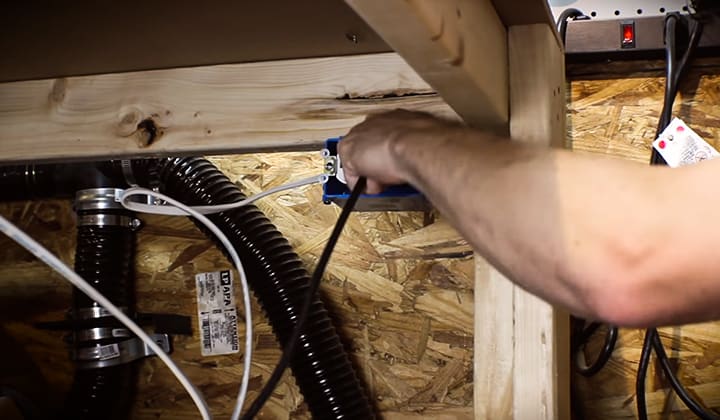
With all the necessary supplies at hand, you can start building your dust collection system right away. Make sure the bucket is sturdy, otherwise it might implode when you start your shop vac. You can also use the hose that comes with your shop vac and a spare one if you want. Step 1 For the first step, you would need to attach a hose to the 45-degree PVC. Start by pre-drilling the pipe with four holes around its end for the small screws. Make sure the screws that you get are long enough to thread through the PVC into the hose. You have to attach the hose to the threaded end of the PVC. Then apply the industrial adhesive to the inside of the PVC and place the hose snugly inside it. Make sure the hose fits firmly, and there is no air coming out of the connected end. Next, close it up with the screws ensuring that the hose does not come out.

Final Thoughts
There you have it, a cheap and easy way to build your own dust collection system. The process we described is not only an affordable option but also an effective way to deal with dust buildup in the workspace. Besides implementing a dust collector you should follow some important tips to keep your workshop neat and clean. We hope you found our guide on how to build a dust collection system informative and helpful. Money should not be an issue that holds you back when you are trying to make the air in your workspace cleaner.
I'm Joost Nusselder, the founder of Tools Doctor, content marketer, and dad. I love trying out new equipment, and together with my team I've been creating in-depth blog articles since 2016 to help loyal readers with tools & crafting tips.