A router is used to hollow out or shape different kinds of materials like wood, fiberglass, Kevlar, and graphite. A router table is specially designed to mount a woodworking router. To rotate the router upside down, sidewise and at different angles easily you need to take the help of a router table.
In a router table, the router is placed below the table. The bit of the router is kept extended above the surface of the table through a hole.
In most of the router tables, the router is placed vertically, pointing upwards but there are also router tables available where the router is placed horizontally. The second type is convenient for making side cuts easily.
Today, we have come with a bunch of simple router table plans to make the finest simple router table and to make your journey with your router easy, effective, and comfortable.
In this post we'll cover:
How to Make a Router Table for a Plunge Router
The router is a frequently used tool in the woodworking station and so the router table is. Though many people opine that any beginner with the basic woodworking skill can make a router table I do not agree with them.
My opinion is that you should have an intermediate level woodworking skill to start such a project of building a router table. If you have an intermediate level skill in woodworking I would appreciate you starting the process of making a router table for a plunge router (like these top choices).
In this article, I will show you the process of building a router table for a plunge router by following only 4 steps.
Required Tools and Materials
For any kind of construction or DIY project, you need to gather all the required materials and tools before starting the project. You should have the following items in your collection to build your router table.
- Saw
- Chisel
- Drill Bits
- Faceplate
- Glue
- Screwdriver
- Jigsaw
- Sander for smoothening
- Router Mounting Bolts
- Faceplate
- Plywood
You are Just 4 Steps Away to Make a Router Table
Step 1
Building the base of the table is the most important part of making a router table. The base should be strong enough to carry the load of the whole body including different kinds of projects that you will run in the future.
You should keep in mind the size of the table when you will design and build the base. A big table with a narrow or comparatively thin base will not last long.
The maple and the plank wood are the best choices for the framework of the router table. A woodworker who has good knowledge about his job always picks a comfortable height for work. So I would recommend you to start working at a comfortable height.
To build the frame at first cut a leg according to the dimension of the design. Then cut the three other legs of the same length as the first one. If you fail to make all the legths equal your table will be unstable. Such a router table is bad for work. Then clamp all the legs together.
Then build a pair of squares. One square is to fit outside of the legs and the other square is to fit inside of the legs. Then glue as well as screw the smaller one about 8” above the floor and the bigger one at the right place.
If there is a cabinet in your design then you need to add a bottom, side panels, and door in the framework. You should measure the space of the router before adding these.

Step 2
After building the foundation now it is time to build the top surface of the table. The top surface should be kept slightly bigger than the head of the router. So, measure a square that is a little bit bigger than the dimension of the router and then draw 1’’ bigger square around it.
When your drawing is finished cut the inner square completely. Then take the chisel and cut a rabbet using a bigger square.
To avoid any kind of malfunctioning you can use a Perspex faceplate because when your eyes are on the level you can make adjustments easily. To make a faceplate you have to take measurement of the large square of the top on Perspex and cut it according to the measurement.
Then take off the handheld base plate of the router and drill a hole at the center point. Then laying the flat Perspex over the edge of the working table enter the router bit through the hole.
Now you have to fix the position of screws and drill holes in the Perspex plate for the screws.
Step 3
Now it is time to construct a fence for your router table. It is a long and smooth piece of wood that guides the router operator to push the applications or projects across the router table.
You need 32” long plywood for making a fence. You have to cut a half circle hole at the place where the fence meets the head of the router. To make your work easier and precise you can screw a narrow piece of wood over this circle so that nothing can fall onto the router bit or hole accidentally.
It is better to make more than one fences for some reason. A larger fence can give better support to larger object ensuring no flip during your work. If the object you are working on is narrow in size then a narrow fence is comfortable to work with.
Step 4
Placing the top surface on the frame attach it firmly using screws and place the Perspex plat that you have made inside the crevice and place the router beneath it. Then push the router bit and screw the mounting router bits at the proper place.
Then assemble the fence with the top surface of the router table so that you can easily take it apart when it is necessary.
The assembly is finished and your router table is ready. You can also disassemble all the parts of the router table including the router for the convenience of storage.
I have forgotten one thing and that is smoothening the table. For this purpose, I have mentioned sander in the list of required materials. Give the final touch in your project by smoothening it using the sander.
The main purpose of your router table is an important matter of consideration. If you are building a router table for a general woodshop then you need to build a large size router table.
If you are a beginner who is intended to do only the beginner’s simple woodworking projects then you may not need to have a large size router table, still having a large size router table is more beneficial. Because day by day you will enhance your skill and will feel the necessity of having a big router table.
So, researching about your present and furture work you should fix the size and design of the router table.
13 Free Simple DIY Router Table Plans
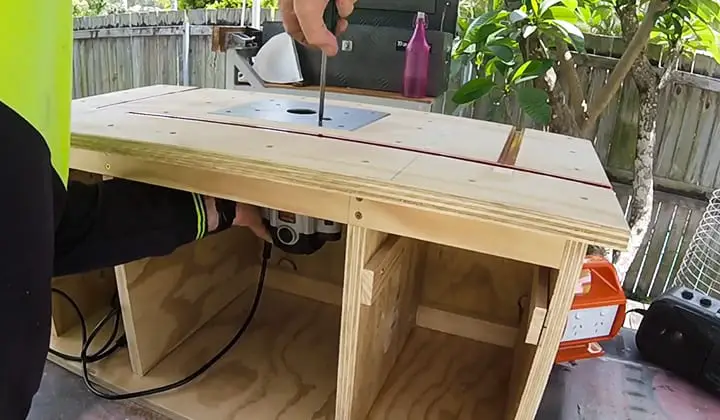
1. Router Table Plan 1
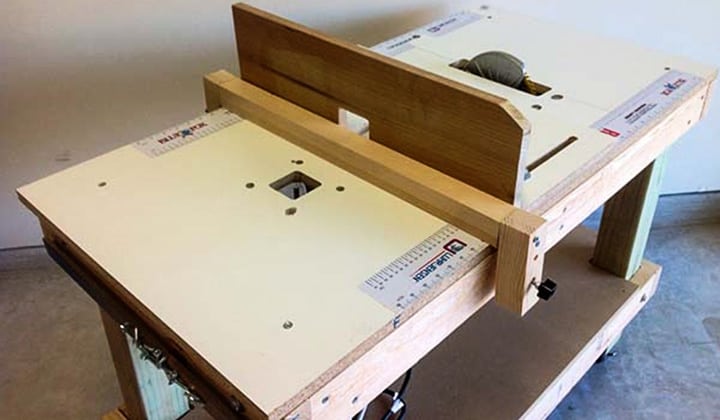
The image shown here is a surprisingly simple router table that is designed to provide a stable work surface to its user. If you are hurrying to get to your work you will feel very comfortable with this router table as its design is wonderfully cooperative to start your work quickly.
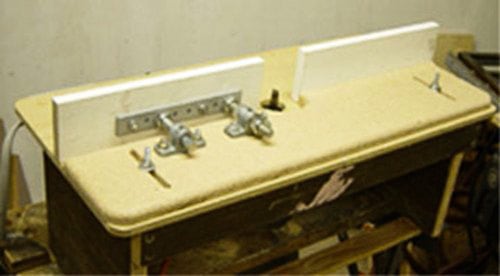
2. Router Table Plan 2
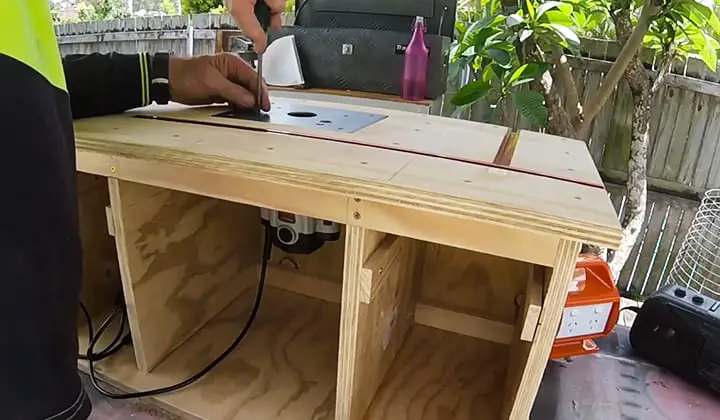
An expert woodworker or DIY worker or carver gets satisfaction in his work when he can turn a simple object into a complex one successfully. The router table shown in the image is designed to help you do complex work with precision and less hassle.
Since you can do complex work with less hassle using this tool you can understand how easy it will be to do the simple cut or curve.
3. Router Table Plan 3
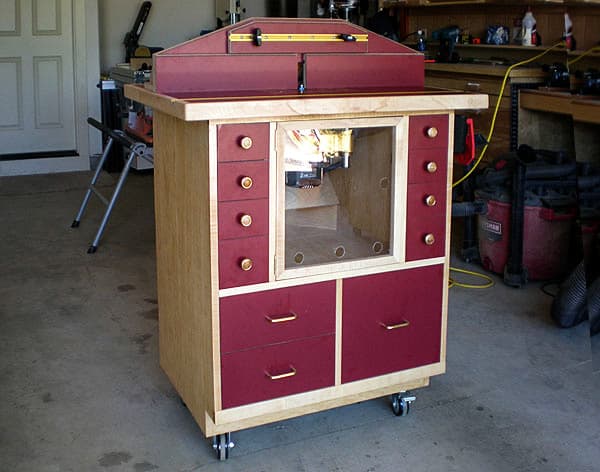
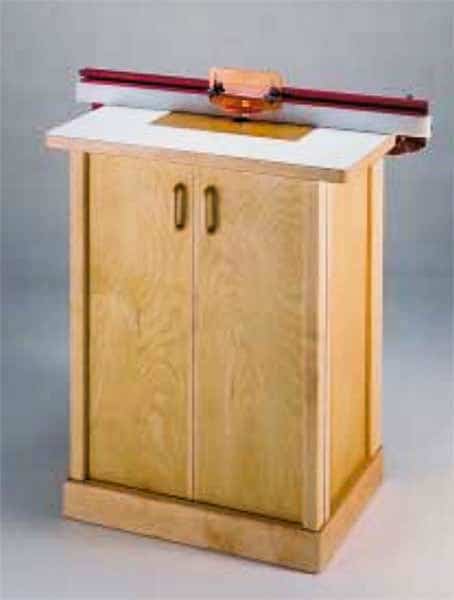
This is a router table with enough space for placing the router and the work surface is also big enough where you can work comfortably. You can notice that this router table also includes drawers. You can store other necessary tools in the drawers.
The color of this router table is attractive. You know the cleanliness of your workplace and the attractiveness of your tools inspire you to work.
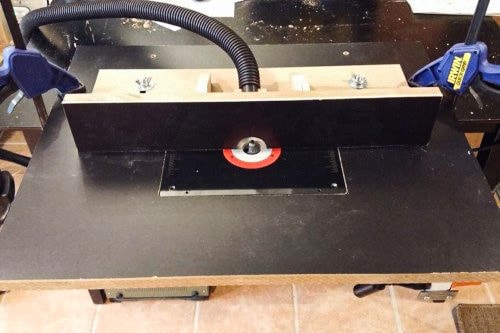
4. Router Table Plan 4
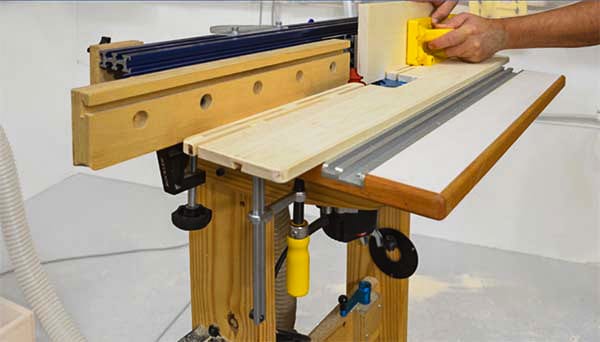
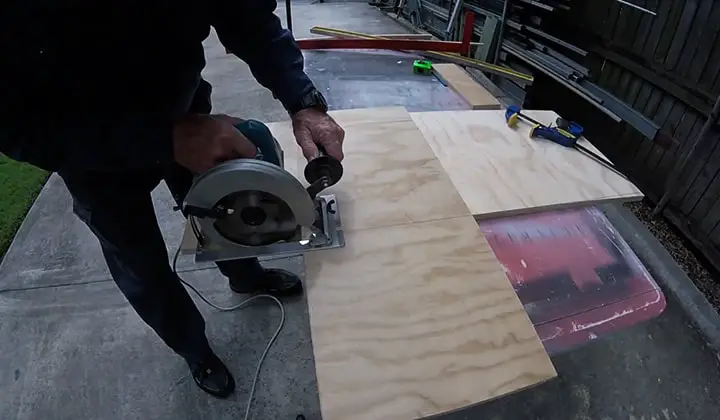
The router table design shown above includes a pressure jig. To achieve precision this pressure jig is very helpful. When you have to route the objects near the edge the pressure jig will help you to make stopped cuts by giving adjusted pressure.
If you think that you need this pressure jig feature this is a perfect router table for you. So, you can choose this router table plan without thinking twice.
5. Router Table Plan 5
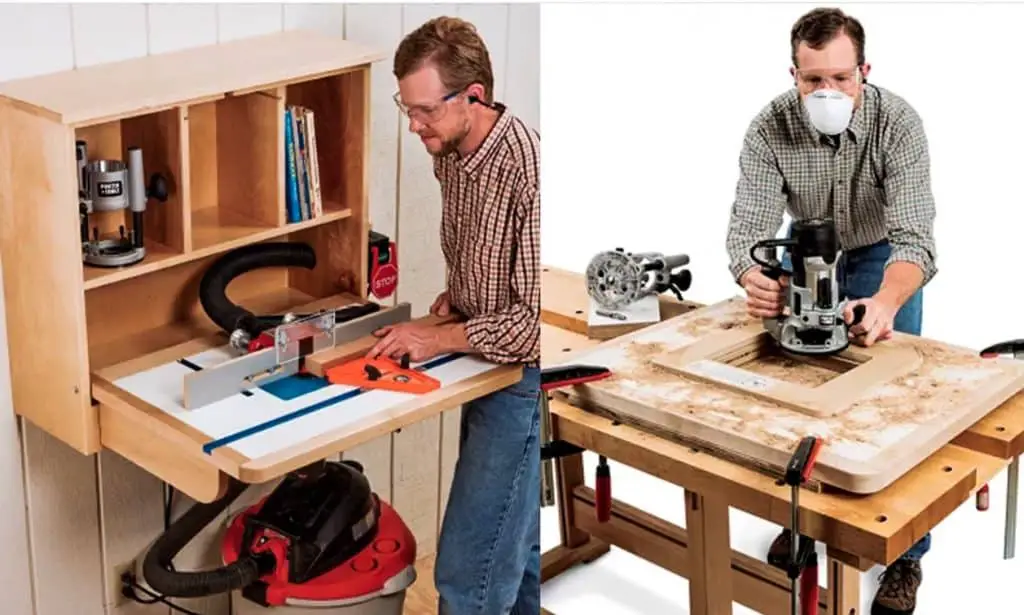
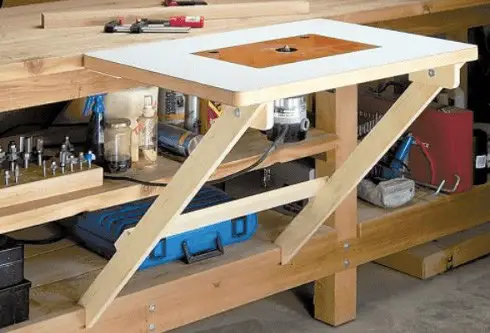
If you have a shortage of space in your work place you can go for a wall-mounted router table. The wall-mounted router table design shown in the image does not take the space of your floor.
Moreover, it is foldable. After finishing your work you can fold it right up and your work place will not look clumsy because of this router table.
6. Router Table Plan 6

This simple router table provides a lot of flexibility to work with your router. Depending on your choice and necessity you can either choose an open base router table or a cabinet base router table. If you need some other tools near your hand you can choose the second one so that you can organize all those necessary tools in the cabinet.
7. Router Table Plan 7
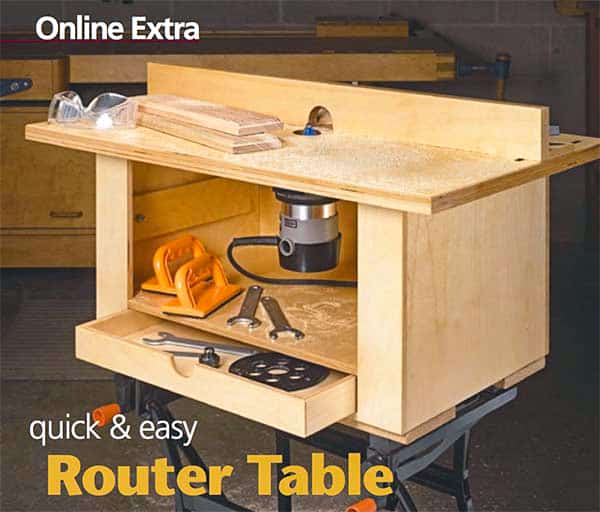
This is a very clever router table design with a tool storage drawer beneath. If you are looking for something simpler and at the same time multi-purpose tool you can pick this design. This router table design is simple and attractive simultaneously and that is why I am calling it a clever design.
8. Router Table Plan 8
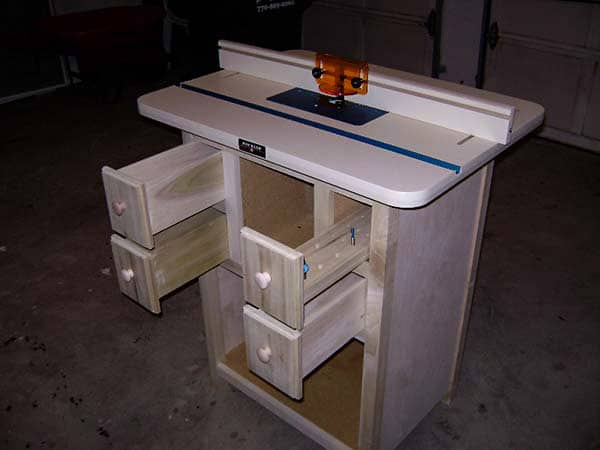
This white touter table has a strong and sturdy work surface and it has multiple drawers to store tools. If you are a very busy woodworker and need a variety of tools during your work this router table is for you. You can store the tools category wise in these drawers.
9. Router Table Plan 9
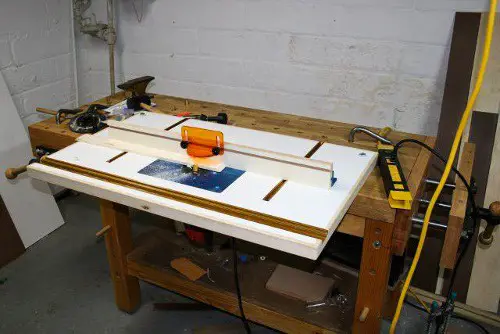
This router table is designed to fit on top of your workbench. You can notice that the design of this router table is very simple but the idea is fantastic.
To maintain precision in your work this table is very helpful. Whenever you need to work with your router you just have to attach this flat base to your main workbench and it is ready for work.
10. Router Table Plan 10
If you do not need to work with your router frequently but occasionally you have to work with your router this router table is designed especially for you. It is designed to attach to your workbench. Whenever you need to work with your router just bolt this table onto a workbench and your workplace is ready.
If you have to do a heavy-duty work where a lot of pressure is applied I will not recommend this router table design for you. This router table is not very strong and suitable for only light-duty work.
11. Router Table Plan 11
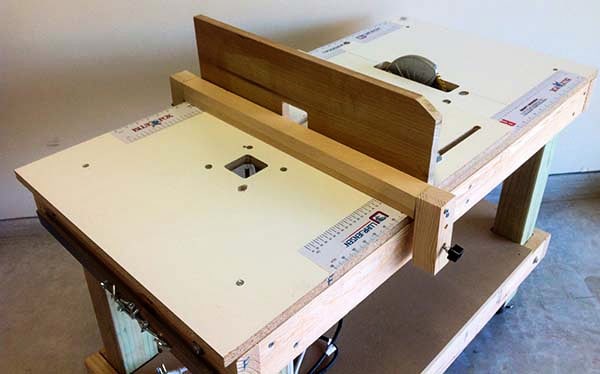
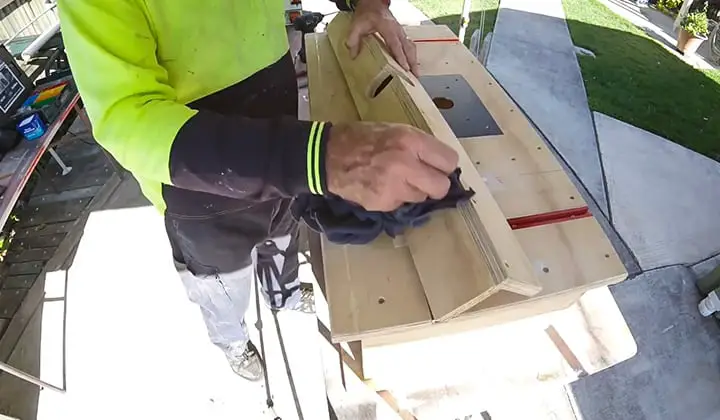
The router table shown in the image is not just a router table, it is a true multipurpose table that is designed to hold a jigsaw and a circular saw. If you are a professional woodworker this table is a perfect choice for you as you need to do different types of works with varieties of tools. This router table is able to meet the necessity of 3 kinds of tools.
12. Router Table Plan 12
It is a simple router table with ample storage space. If you need a strong router table with a lot of storage space you can pick this design.
13. Router Table Plan 13
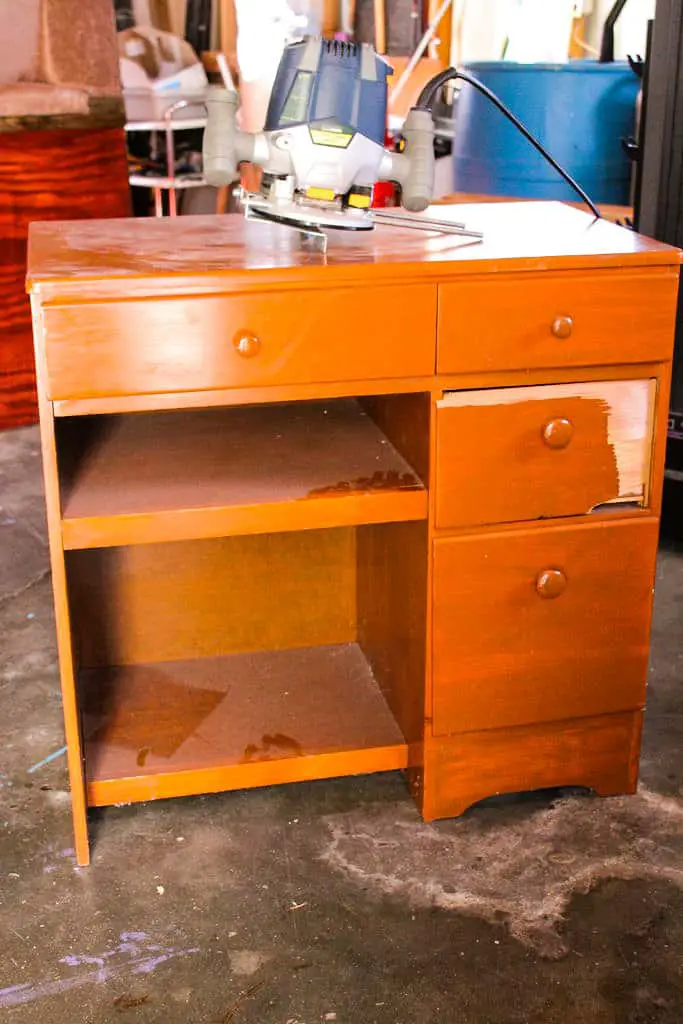
You can convert an old desk lying in your house idly into a strong router table like the image. It has multiple storage drawer with a strong work surface.
To get a fully functional router table at the low investment the idea of converting an old desk into a router table is functional indeed.
Final Thought
Thin, small, and long materials that are tricky to work with, router tables make those works easier. You can use a router table for trimming and template work, joining two materials with different kinds of joints like dovetail and box joinery, grooves and slots, cutting and shaping, and many more.
Some projects require same cut consistently many times which is difficult if you are not an expert but the router table makes this task easier. So even if you have an intermediate level skill you can do this task using a router table.
I hope that you have found out your required router table plan from the 13 simple router table plan shown in this article. You also can buy high-quality router table at a reasonable price from the market.

I'm Joost Nusselder, the founder of Tools Doctor, content marketer, and dad. I love trying out new equipment, and together with my team I've been creating in-depth blog articles since 2016 to help loyal readers with tools & crafting tips.