I love creating free content full of tips for my readers, you. I don't accept paid sponsorships, my opinion is my own, but if you find my recommendations helpful and you end up buying something you like through one of my links, I could earn a commission at no extra cost to you. Learn more
If you are a DIYer or a wannabe DIYer, a beam torque wrench is a must-have tool for you. Why so? Because there will be a lot of times when you will need to tighten a screw at the perfect level.
‘Too much’ can ruin the bolt, and ‘not enough’ can leave it unsecured. A beam torque wrench is a perfect tool to reach the sweet spot. But how does a beam torque wrench work?
Tightening a bolt properly at the right level is a good practice in general, but it is almost crucial in the automobile sector.
 Especially when you will be tinkering with the engine parts, you have to strictly follow the levels the manufacturers provided. Those bolts work under extreme situations anyway. But in any case, it is a good practice in general.
Before entering the steps of using it –
Especially when you will be tinkering with the engine parts, you have to strictly follow the levels the manufacturers provided. Those bolts work under extreme situations anyway. But in any case, it is a good practice in general.
Before entering the steps of using it –
What Is A Beam Torque Wrench?
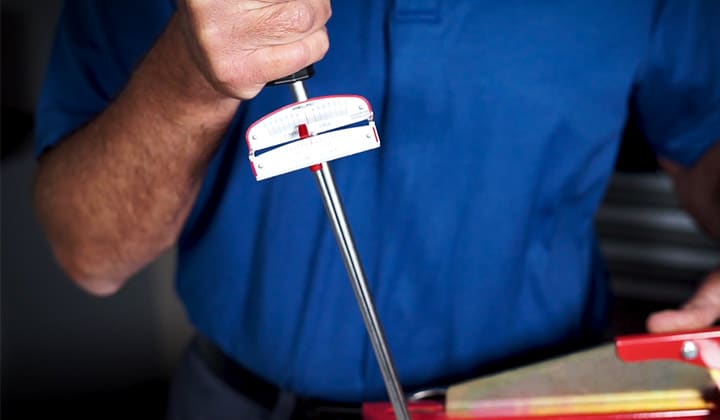
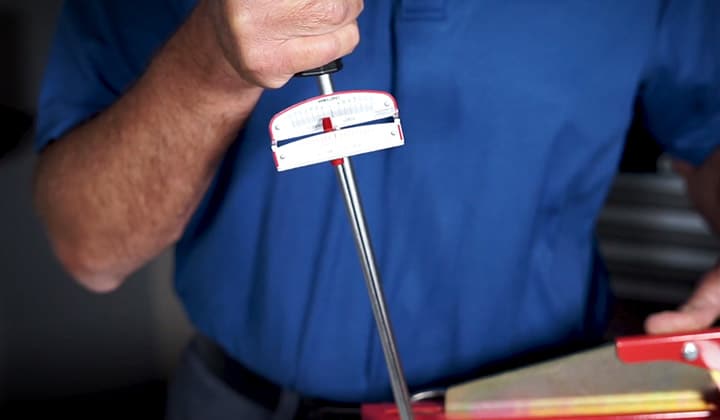
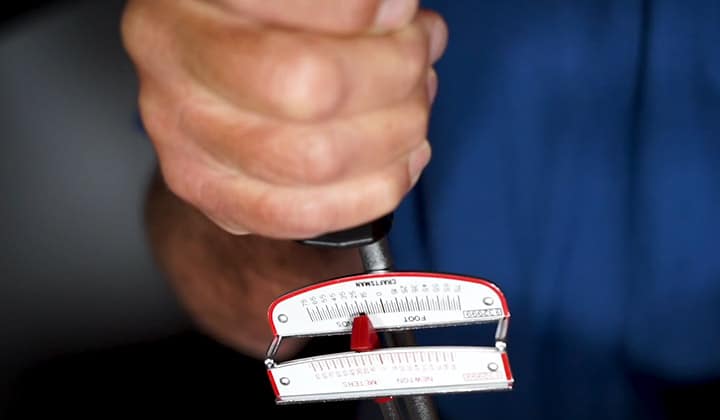
A torque wrench is a kind of mechanical wrench that can measure the amount of torque being applied on a bolt or nut at the moment. A beam torque wrench is a torque wrench that displays the amount of torque, with a beam on top of a measuring scale. It is useful when you have a bolt that needs to be tightened at a specific torque. There are other kinds of torque wrenches available, like a spring-loaded one or an electrical one. But a beam torque wrench is better than your other options because, unlike the other types, with a beam wrench, you do not need to cross your fingers and hope that your tool is calibrated properly. Another plus point of a beam wrench is that you do not have as many limitations with a beam torque wrench as you would with, let’s say, a spring-loaded one. What I mean is that with a spring-loaded torque wrench, you cannot go beyond the threshold of the spring; neither higher torque nor lower than the spring will allow you. But with a beam torque wrench, you have much more freedom. So –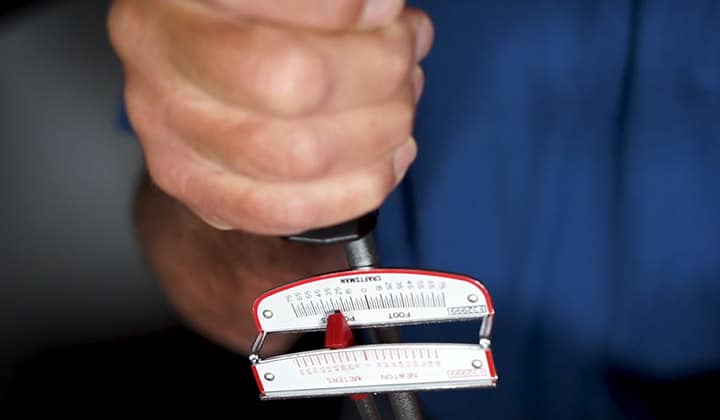
How To Use A Beam Torque Wrench?
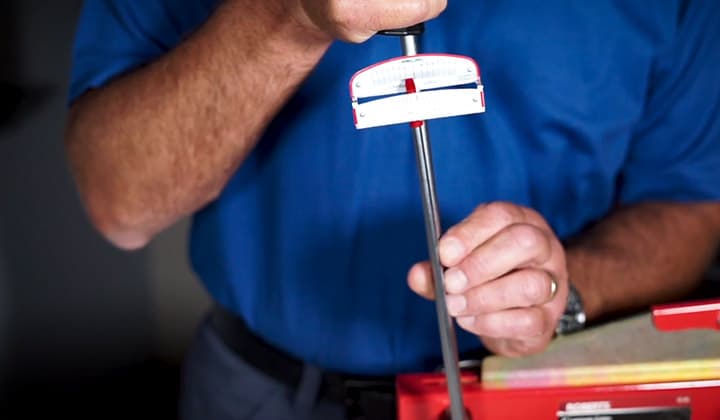
The using method of a beam torque wrench is different from that of electrical torque wrench or spring-loaded torque wrench as the working mechanism of different type of torque wrench varies. Using a beam torque wrench is just as simple as using a mechanical tool goes. It is a pretty basic tool, and with a few simple steps, anyone can use a beam torque wrench like a pro. Here is how it goes- Step 1 (Assessments) At first, you will need to check your beam saw to make sure that it is in the perfect working state. No signs of damage, or excessive grease, or collected dust is a good point to start from. Then you need to get the right socket for your bolt. There are several types of sockets available in the market. Sockets come in all shapes and sizes. You can easily find a socket for the bolt you are handling whether it be a hex head bolt, or a square, or a countersunk hex bolt, or something else (size options included). You will need to get the right type of socket. Place the socket on the wrench head and gently push it in. You should hear a smooth “click” when it is installed properly and ready to use.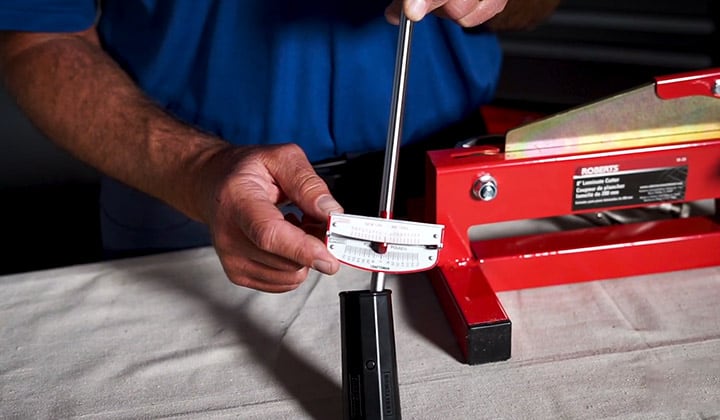

Conclusions
If you followed the steps mentioned above properly, using a beam torque wrench is as simple as cutting through butter. And with time, you can manage to do it like a pro. The process is not tedious, but you will need to be careful that the reader beam does not touch anything at any point. This is a thing you will need to be watchful about all the time. It will not get easier over time. Be sure to take care of your beam torque wrench just as much as your car or other tools because it is also a tool, after all. Even though it may look and feel too simple to care about, it relies on the condition of the tool in terms of accuracy. A defective or neglected tool will lose its preciseness fast.
I'm Joost Nusselder, the founder of Tools Doctor, content marketer, and dad. I love trying out new equipment, and together with my team I've been creating in-depth blog articles since 2016 to help loyal readers with tools & crafting tips.