If you’re a professional craftsman or even a beginner, you have probably heard the name of the flush trim router bit. Flush trim router bits are one of the most adaptable and widely used wood trimming equipment all over the world. It is generally used to trim shelf edges, plywood, and fiberboard.
However, using a flush-trim router is not as simple as it looks, especially if you’re fresh to crafting or are just getting into it. Working with a flush-trim router without the proper training or knowledge can be dangerous to you and your crafts.
Throughout this post, I will explain how to use a flush trim router bit to your benefit. So, without further ado, go ahead and read the entire article and prepare yourself to use the flush trim router bit in your crafting project.
In this post we'll cover:
How Does A Flush Trim Router Bit Work
The term “flush trim” means making a surface precisely flush, level, and smooth, and the flush trim router bit exactly does that. You can also use it to smooth down wooden or plastic surfaces, cut rabbits, trim laminate or Formica countertops, clean plywood, lipping, drill holes, and many other things.
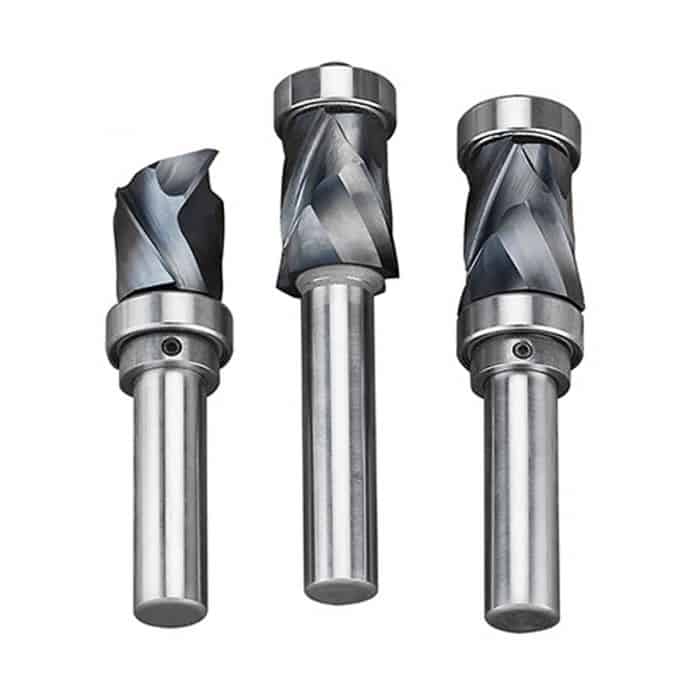
Generally, a flush-trim router is made up of three parts: an electric rotor, a cutting blade, and a pilot bearing. When power is supplied via the rotor, the blade rotates at a high speed, and the blade or bit is guided by a pilot bearing with the same cutting radius as the bit. This high-speed spinning blade will trim your wooden workpiece’s surface and corners. You just need to use the pilot bearing system to determine the blade’s path.
How Can I Use A Flush Trim Router Bit
We already know that a flush-trim router bit can be used to trim a wooden surface flush and create numerous identical forms of an object. In this section of the post, I’ll go over each of them in greater detail and explain to you how to accomplish it step by step.
Step One: Ensure That Your Router Is Clean
Make sure your router’s blade is completely dry and clean before you begin. For your convenience, I always recommend you keep your router clean. Otherwise, your workpiece will be destroyed, and you may be harmed.
Step Two: Prepare Your Router
You’ll need to spend some time setting your trim router at first. During the setup procedure, the only modification you need to make is the height, which you can accomplish by simply twisting the thumb screw left or right.
Step Three: Change Your Router Bits
Changing the bits of a router is very simple. You can change the bits of your router quickly by using a pair of wrenches or a solitary wrench with a locking shaft. You must follow this process to change the bit:
- Make sure your router is switched off and disconnected from the power supply board first.
- Now you need two wrenches: The first one for the spindle and another one for the locking screw. Set the first wrench on the spindle and the other one on the screw.
- Withdraw the bit from the spindle and set it aside. Now take your new router bit and insert it into the spindle.
- Lastly secure the bit to the router, tighten the locking nut.
Step Four
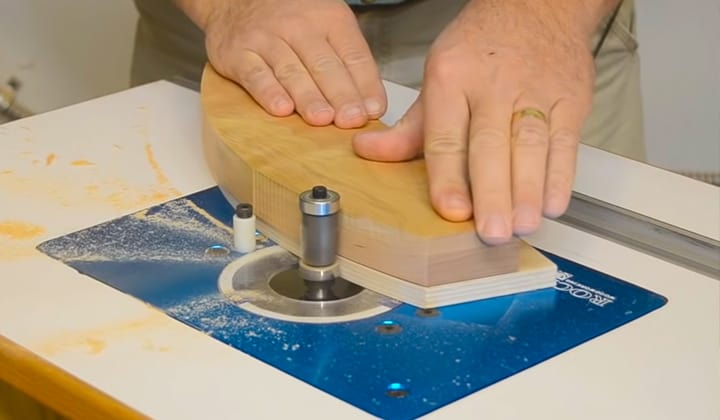
Now take your template wooden piece that you wish to duplicate or trim and trace around your second wooden board. Make sure the tracing line is a little wider than the template. Now roughly cut this outline.
At this step first, place the template wooden piece down and then put the bigger roughly cut portion of the workpiece on top of it.
Final Step
Now start your flush trim router by pressing the pour button and trim the roughly cut wooden workpiece by touching the comparison piece all the way around. This process will provide you with a perfect duplication of that reference piece.
Frequently Asked Questions (FAQ)
Q: Is using a flush-trim router risky?
Answer: As flush-trim routers use high voltage electricity and contain a rotor and a sharp blade, it is highly dangerous. However, if you are well-trained and understand how to use a flush trim router bit, operating with the flush trim router will be a piece of cake for you.
Q: Is it possible to operate my trim router upside down?
Answer: Yes, you can use your flush trim router both upside down. Even using the router upside down, expand the capabilities of your router, and make routing faster and easier. Even if you operate your flush trim router backward, you’ll be able to feed the stock safely into the bit using both hands.
Q: Is it possible for me to use my trim router as a plunge router?
Answer: Yes, you can use your flush trim router bit like a plunge router, but in this case, you have to be more careful during doing the job
Conclusion
Using router bits is a quite daunting task for beginners but with practice and experience, it will be easier for you. The flush trim router bit is known as the third hand of a crafter. You can use it to accomplish a variety of tasks without facing that much difficulty. It will provide a lot more versatility to your toolkit.
But, please keep in mind that before using a flush-trim router, you must be well-trained or at least know how to use a flush-trim router appropriately. Otherwise, the project you are working on will be demolished and you’ll end up hurting yourself. So it is imperative that you read this post before beginning to work on your desired project.

I'm Joost Nusselder, the founder of Tools Doctor, content marketer, and dad. I love trying out new equipment, and together with my team I've been creating in-depth blog articles since 2016 to help loyal readers with tools & crafting tips.