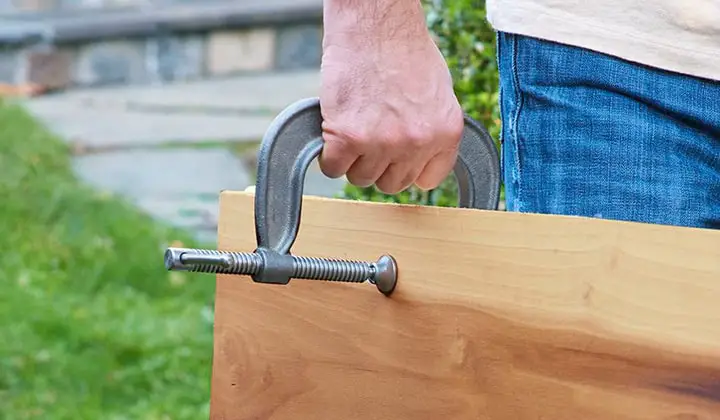
A C-clamp is a useful tool for holding wooden or metal workpieces in position during carpentry and welding. You can also use a C clamp in metalworking, machining industry, and hobbies and crafts like electronics, house construction or renovation, and jewelry crafting.
However, using a C clamp is not as simple as it appears. You must understand how to use it properly, or it will damage your workpiece and, in certain cases, yourself. For your convenience, we’ve written this article to show you how to use a C clamp and given step-by-step instructions.
So, if you’re new to C clamps, don’t get a step back. After reading this article, I guarantee you’ll know everything you need to know about the C clamp.
In this post we'll cover:
How Does A C Clamp Work
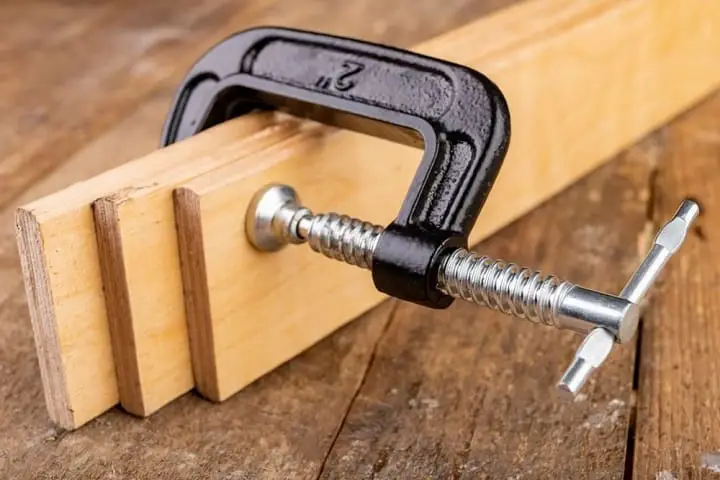
If you want to use a C clamp first you need to understand what exactly a C clamp is and how it works. C clamp is a device that holds objects securely in position by applying inward force or pressure. C clamp is also known as the “G” clamp, gets its name from its shape that kinda looks like the English letter “C”. A C-clamp consists of several components, including the frame, jaws, screw, and handle.
The Frame
The frame is the major part of a C clamp. Frame handles the pressure applied upon the workpiece while the clamp is in operation.
The Jaws
The jaws are the components that actually grab the workpieces and keep them together. Every C clamp has two jaws, one of which is fixed and the other one is movable, and they are placed opposite to one another.
The Screw
C clamp also has a threaded screw that is used to regulate the movement of the movable jaw.
The Handle
The handle of the clamp is attached to the C clamp’s screw. It’s usually used to adjust the clamp’s movable jaw and spin the screw. You can close the jaws of your C clamp by rotating the handle clockwise until the screw is tight, and open the jaws by rotating the handle anti-clockwise.
When someone rotates the screw of the C clamp the moveable jaw will compress and it will fit tightly against the object or workpiece placed between the jaws.
How Can I Use A C Clamp
You will find different types of C clamps on the market these days with various shapes, sizes, and applications. However, their methods of functioning are the same. In this section of the text, I’ll show you how to operate a C clamp on your own, step by step.
Step One: Make Sure It Is Clean
Before starting work, ensure that your C clamp is clean and dry. Excess glue, dust, or rust from the previous project may reduce the performance of your C clamps. If you begin working with an unclear C clamp, your workpiece will be damaged, and you may be injured. For your safety, I recommend cleaning the clamp with a wet towel and replacing the clamp pad if there is any sign of severe wear.
Step Two: Glue The Workpiece
At this stage, you have to take all of the object’s pieces and glue them together with a thin coating of glue. This approach guarantees you that the object’s different pieces stay together when the clamps are reduced and immense pressure is applied to unite them.
Step Three: Place The Workpiece Between The Jaw
Now you must insert the glued workpiece between the C clamp’s jaws. To do so, pull the large handle of your C clamp to extend the frame by three inches and place the workpiece within. Place the movable jaw on one side and the rigid jaw on the other of the wooden or metallic workpiece.
Step Four: Rotate The Screw
Now you have to rotate the screw or lever of your C clamp using the handle with gentle pressure. As you twist the screw the moveable jaw of the clamp will provide inward pressure on the workpiece. As a result, the clamp will hold the object securely and you will be able to do various tasks on it, such as sawing, gluing, and so on.
Final Step
Clamp the workpiece together for at least two hours until the wood glue has dried. After that, release the clamp to reveal the finished result. Don’t rotate the screw too tight. Keep in mind that squeezing the screw too hard may cause harm to your work material.
Conclusion
If you are a craftsman, you understand the value of a C clamp better than anybody else. But if you are not a crafter but wish to work on a project or renovate your home, first you have to know about the types of C clamp and how to use a C clamp properly. If you work without knowing how to use a C clamp, you will harm both your workpiece and yourself.
So, in this instructive post, I’ve detailed everything you need to know about the C clamping approach or method. This post will guide you through the process of finishing your project with C clamps.

I'm Joost Nusselder, the founder of Tools Doctor, content marketer, and dad. I love trying out new equipment, and together with my team I've been creating in-depth blog articles since 2016 to help loyal readers with tools & crafting tips.