When you think of a workshop a few years ago, images of a saw, chisel, screws, a piece of wood, and possibly a panga come to mind. But, all of those old instruments have been replaced by a modern technical gadget known as a trim router. Among crafters, it is also known as a laminate trimmer or trimming router.

With this tiny, simple-looking tool, you can handle a variety of tasks. In this article, I’ll cover everything you need to know about trim routers and answer any questions you may have. If you’re still unsure of what you can do with this magic tool, keep reading; you won’t be disappointed.
In this post we'll cover:
What is a Trim Router?
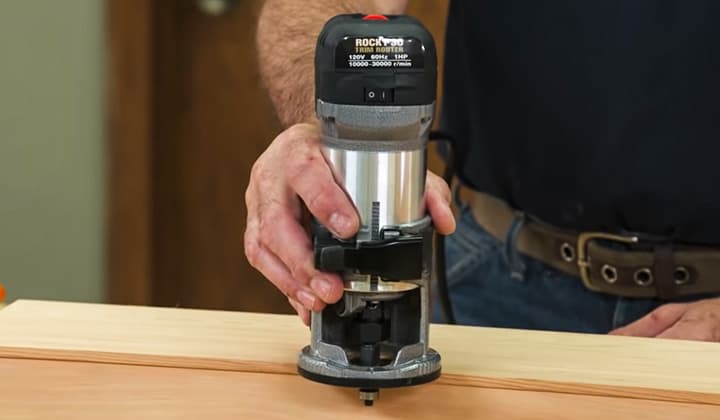
A router is a handheld power tool used that is used to route or hollow-out an area on hard surfaces, like wood or plastic. They are specially used for carpentry, in addition to other woodworks. Most routers are handheld or fastened at the end of the router table.
Every router is different, and their parts aren’t identical. They have a vertically mounted electric motor with a collet attached to the end of its spindle that is encased in the tool’s housing. Routers having 230V/240V motors are suited for domestic or workshop uses, whereas 110V/115V motors can be used on building or work sites.
It also comes with a steel sleeve, called collet, that is located at the end of the motor’s spindle. The bottom half of the router is called the base. There is also another flat disc-like structure that fits at the bottom of the base, which is called sub-base or base plate. Some routers have speed controls that add up to the versatility of the instrument.
The trimming router or laminate trimmer is, essentially, a smaller version of its big brother. It is used for smaller general routing works. Their small form factor and weight are what makes them easier to use.
Uses Of A Trim Router
A trim router (top ones reviewed here) is referred to as a crafter’s third hand. In most workshops, it has now become a necessary power tool for its multiple-use and easy control system. It can perform a wide variety of tasks including Creating Duplicate Parts, Cleaning Wooden Surfaces, Drilling Holes, Cutting Shelf Lipping, Polishing Edges Of Workpieces, Cutting Hinges, Cutting Plugs, Cutting Joinery, Mortising Inlays, Sign Making, Logo Making, and many more.
Creating Duplicate Parts
You can create similar kinds of items or workpieces using a trim router. It is called template routing. Trim routers’ top-bearing design blades make it possible by carving out the wood around a blueprint or template. By consuming only 2 HP (Horse Power) it can trim off 1/16″ of material to 1x or thinner stock flush with a template.
To make a duplicate part, trace around your second wooden board using your template wooden piece that you want to copy. Make the tracing line slightly broader than the template. Now make a rough cut around this outline. It will create a replica of that reference piece for you.
Cleaning Wooden Surface
Trim routers are equipped with a solid-carbide polishing bit or a flush trimmer that can assist you in polishing the surface of your veneer.
Drilling Holes
Trim routers are great for drilling holes. You can drill pinholes and knob holes with your trim router just like any other normal router.
Drilling holes with a trim router is very easy. All you have to do is create a template of the pin and insert a 1/4″ up cutting spiral blade into the trimmer. Then start the trimmer and it will do the rest.
Trimming Shelf Edging
You can use a trim router to trim shelf lipping instead of a sand veneer. Using sand veneer to trim shelf lipping is expensive even it can damage your workpiece and harm you.
Trim router cut the solid wood flush for shelf lipping. Place the trim router’s blade straight down and deeper than the bordering depth, then zip off the excess material.
Polishing Edges Of Workpiece
Using a trim router you can polish the edge of your workpiece. You can also shape larger geese, bays, beads, and other edges using your trim router.
The router comes equipped with specific blades for this purpose. All you have to do now is put the blade in place and polish the edge.
Cutting Hinge
A chisel is typically used to cut a door hinge or any other type of hinge. But you can do that efficiently with the use of a trim router.
You’ll need a 1/4″ straight blade and a normal guide collar to perform this job. Simply place the blade in your router and create a u-shaped template to effortlessly cut your door hinge.
Cutting Plugs
Cutting plugs is another great use for a trim router. You can cut multiple thin flush plugs in a short length of time using your trim router.
Grab your trim router to a straight bit, use two pieces of paper as a gap for adjusting blade depth, finish up with a little sanding, and you are done.
Sign Making
You can create a variety of signs with your trim router. Making signs without the right instrument can be a time-consuming operation. A trim router can assist you in this situation. It will make your job easier by allowing you to create signs in a short amount of time.
Trim router will provide you with a lot of sign-making templates that will make your job easier.
How to Use a Trim Router
Routers are essential tools when it comes to woodwork and carpentry. Almost every woodworker uses routers to make complex wood pattern and smoothen edges of the workpiece as it brings perfection to it. These instruments are a must-have for people who are serious about their job.
Trim routers or laminate trimmers are relatively smaller and lighter than regular routers. Originally designed to trim laminate countertop material, they weren’t the most versatile of tools when they came out around two decades ago. But now, these small and compact instruments offer a lot of versatility and is used in various tasks.
It is undoubtedly an indispensable power tool in the workshop. And knowing how to use the tool effectively and efficiently is as important as having it laying around your workspace.
In this article, we will show you the ropes around operating a trim router safely and flawlessly, and also discuss some advantages this handy tool has to offer.
The trim router is a surprisingly versatile tool. Knowing how to use it can be very helpful and rewarding. You can carry out various tasks like smoothening out edges of wood or plastic, cut dadoes, cut rabbets, trimming laminate or Formica countertops, cleaning veneer, trimming shelf lipping, sign-making, hole drilling and so on.
We will now teach you step-by-step on how you can make use of your trimmer effectively.
Preparing the Router
Just like any other power tool, you should adjust and prepare your router before use. In most cases, all you need to do is adjust the height, and you should be all set. You can do that by fiddling around with the thumbscrew. Some versions of trim routers need the bit depth to be adjusted too. To adjust the depth, you will find a lever with a quick-release function.
You would be wise to take the ease of changing router bits into consideration while buying the router. Some routers make changing bits easy, while others require the base to be removed to change the bits. Thus, considering that while buying can save you from a lot of hassle.
Changing Router Bits
All you need to change the router bits is a set of wrenches. Even if you have a single one that comes with a locking spindle, you do not need to worry about much else. The following steps should give you a clear idea of how to change the trim router bits.
Be sure that the router is turned off and unplugged before you change the bits.
- For the steps, you need two wrenches: one for the shaft and the other for the locking nut. However, if your router comes with a locking mechanism built-in, you might be able to get by with only one wrench.
- Place the first wrench on the shaft and the second on the locking nut. You need to pull out the bit after you release it from the nut. For that, you need to twist it in a counter-clockwise motion.
- Remove the bit from the shaft. In addition to the locking nut, you will find a cone-shaped piece that comes with splits, called a collet. It is responsible for keeping the router bit secured to the trim router. Carefully remove both the locking nut and the collet and clean the shaft.
- Then slide the collet back in and install the locking nut.
- Take your new router bit and push it in through the shaft
- Tighten the locking nut to secure the bit to the router.
That’s it. You are done with changing the bits of your trim router.
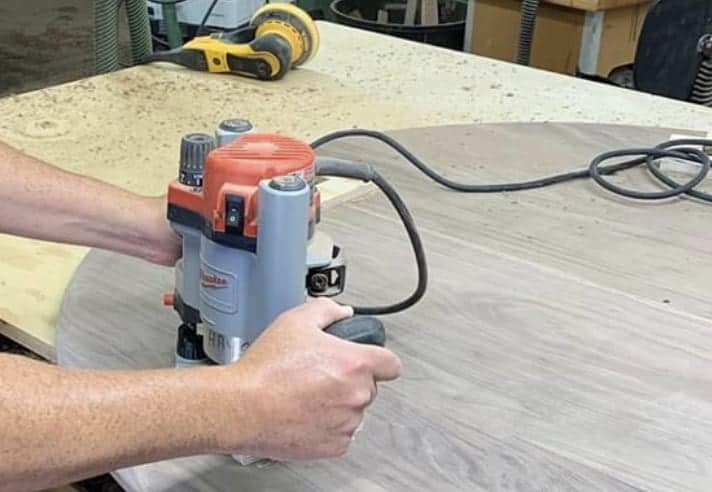
Using the Router
The main purpose of a trim router, depending on the bit, is to polish edges and to make smooth curves on wooden workpieces. Furthermore, it works well when you are working on V-grooves or beaded edges. If you have the proper bits, you can even make small moldings fast and efficiently.
Additionally, when using the trim router, you do not need to worry about any tear-outs. If you have the straight edge bit at hand, you can even trim the ends of a plywood edge with a trim router.
Advantages of Using a Trim Router
A trim router has many noteworthy advantages when compared to its counterparts. A trim router is an all-rounded tool in the router family. Due to its small form factor, it can be used to do many works that would rather seem impossible to do using a conventional router. Its advantages have appealed to its audiences. Some of them are discussed below-
- A trim router has many noteworthy advantages when compared to its counterparts. A trim router is an all-rounded tool in the router family. Due to its small form factor, it can be used to do many works that would rather seem impossible to do using a conventional router. Its advantages have appealed to its audiences. Some of them are discussed below-
- A trim router is a small tool. That means it can be hand-used. Routers are generally table-mounted and bulky, making them hard to work around delicate pieces. Since the trim router is small and light, it can be used to carve the smallest detail. This gives them an edge over the other routers.
- The versatility that a trim router offers to its user is unparalleled. Many intricate detailing can be done using the trim router owing to its small size and weight.
- The bits can be swapped for different works, offering you more freedom.
- The trim router cuts at a much higher speed, meaning it can make more precise cuts. The bits rotate quicker, making the instrument cut more sharply.
- A trim router truly shines when it comes to edging laminates. The small trimmer can provide clean, rounded-off edges to the laminates thanks to its size and precision.
- One of the most notable factors that make a trim router superior to its counterparts is portability. Its size and weight allow it to be moved anywhere without any hassle, making it much hassle-free to store. Its portability also makes it ideal for workers who work outside of their workshops.
- The factor that gives trim routers a big edge is its low cost. It offers you great value for how much it costs as it is quite a versatile device.
Safety Tips for Using a Trim Router
- Using any power tools requires safety precautions; the same goes for the trim router. Careless handling of power tools has proven to be dangerous or even deadly. No matter the intensity of the work, you should always take safety measures. The following measures must be taken when handling a trim router-
- Always wear protective equipment like safety glasses (check the best here), gloves, etc. Avoiding this step can result in accidents and may impair eyesight or hearing in extreme cases.
- Don’t take heavy cuts as it causes kickback, which can be dangerous. Instead, take more light cuts.
- Make sure your instrument is in proper working condition.
- Be sure not to overload or strain the bit or the router.
- Ensure that the motor is securely locked in place.
- Maintain proper body posture and stand firmly while handling the tool.
- Always make sure that you unplug the device after usage and store it in a safe place away from children’s reach.
Frequently Asked Questions (FAQ)
Q: Is it a smart decision to invest in a trim router?
Answer: Yes without any doubt. Though the trim router is small in size compared to other general routers, it can still do various jobs including rinse laminate, veneer border banding, sign making, logo making, and wood trimming.
Q: Can I use a trim router to cut plastic sheath?
Answer: Yes, you certainly can. But, while cutting a plastic sheath, you must use a solid tungsten carbide blade. Because if you use an HSS cutter it will quickly become blunt.
Conclusion
Trim routers are well-known among crafters all over the world for their efficiency and versatility. There is a myth about trim routers that a skilled crafter can make anything with a trim router. This myth can be real if you know your router very well including where you can use it and what limitations it has.
But unfortunately, we are unaware of our router’s capabilities and limitations. As a result, we don’t get the desired output from our router, even though we don’t use it properly most of the time. This article discusses how you can use your trim router. Take the time to read it, it will improve your work quality and efficiency.

I'm Joost Nusselder, the founder of Tools Doctor, content marketer, and dad. I love trying out new equipment, and together with my team I've been creating in-depth blog articles since 2016 to help loyal readers with tools & crafting tips.