Table saws are one of the best tools a carpenter can have in their arsenal of woodworking equipment.
However, not every carpenter is using a table saw in the right, or safe, manner.
So, if you’re worried about the table saw you haven’t started using yet, it’s completely okay; now you can start the correct way.
In the following article, we’ve compiled all you have to know on how to use a table saw and be safe while you’re woodworking with this strong tool. All the info is simplified and broken down, so even if you’re a beginner or a woodworker rediscovering the skill, you’ll find everything easy to learn.
In this post we'll cover:
Table Saw Anatomy
Table saws come in various designs, but to keep things simple, there are two main types of table saws that are mainly differentiated by portability. Portable cabinet saws are small and can be easily moved from one spot to the other, while other table saws resemble cabinet saws and are bigger and heftier.
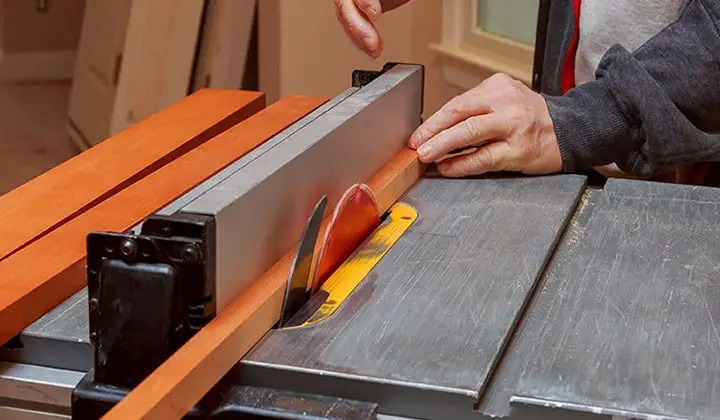
Despite the difference in portability, most of the features between table saws are very similar. First off, the surface of the table is flat, with a throat plate around the blade. This is for accessing the blade and the motor. There’s an adjustable fence at the side of the table with a lock for holding lumber in place.
There’s a miter gauge slot on the table surface with a removable miter gauge that also holds lumber at an angle while cutting. An adjustable base is where the unit sits so that the user can set their working height.
Plus, there’s also blade height and bevel adjustments at the side of the unit, which can be wound to the desired setting. This allows users to move the blade up or down or to any angle from side to side in 0 to 45 degrees.
Most cabinet table saws have riving knives at the end of their blades, while portable table saws don’t usually feature. This is to prevent kickback from two sections of cut lumber closing up around the blade. The table surface is also larger than a portable table saw’s surface and has a closed base for collecting excess dust.
Moreover, the cabinet saw has a much bigger and powerful motor, which is why it’s used more in professional carpentry and construction.
Safety Hazards While Using a Table Saw
As robust as a table saw can be, it is also very capable of causing injuries and accidents. These are some of the mishaps to be on the alert for:
Kickback
This is the most hazardous occurrence that can take place while operating a table saw. Kickback is when the material being cut gets wedged between the blade and the adjustable rip fence and causes a lot of pressure on the material, which ends up being abruptly turned and propelled by the blade towards the user.
As the blade moves at high speed and the material is hard, it can cause serious injuries to the user. To reduce the risk of kickback, it’s best to use a riving knife and adjust the fence at a reasonable measure while holding the material firmly.
Snags
This is just like it sounds. Snags are when a piece of the user’s clothing or gloves catches onto a tooth of the blade. You can imagine how horrific this would end, so we won’t get into the details. Wear comfortable clothing and keep them away from the site of the blade at all times.
Minor cuts can also occur from the blade, the cut lumber, splinters, etc. So don’t ditch the gloves just to avoid snags.
Irritating Particles
Small fragments of sawdust, metal, and more solid materials can fly off into the air and enter your eyes, nose, or mouth. Even if you don’t experience breathing problems, these particles entering your body can cause harm. So, wear goggles and a mask at all times.
How to Use a Table Saw – Step by Step
Now that you know the basics, it’s time to try out your table saw. Here’s how to go about it –
Step 1: Take necessary safety precautions
Wear gloves, goggles, a dust (really bad for your health!) respirator mask, and comfortable clothing. If your sleeves are long, roll them up and out of the way of the blade. Keep in mind that the blade will be moving towards you, so be very cautious about how you angle your lumber.
Step 2: Adjust the Blade
Make sure the blade you’re using is clean, dry, and sharp. Don’t use any blades with missing teeth, upturned teeth, dull edges, or rusted over parts. This will overload the motor or even cause the blade to break during use.
If you need to change the blade on the table saw, you need to use two wrenches. One wrench is used to hold the arbor in place, and the other is used to turn the nut and take off the blade. Then, place the blade of your choice with the teeth facing you and replace the nut.
Put the lumber of your choice next to the blade and adjust the height and bevel settings so that the top of the blade peers over the material’s surface by no more than a quarter.
Step 3: Adjust the Material
Place your lumber so that it sits straight on the surface of the table saw and faces the blade. For precision, mark the section you want to cut down on. Make sure to adjust the fence so that it doesn’t wedge the lumber but support it from the side.
Remember that the area between the blade and the fence is called the “kickback zone”. So, never push the lumber towards the blade, but rather down and straight ahead so that the lumber doesn’t turn and catapult towards you.
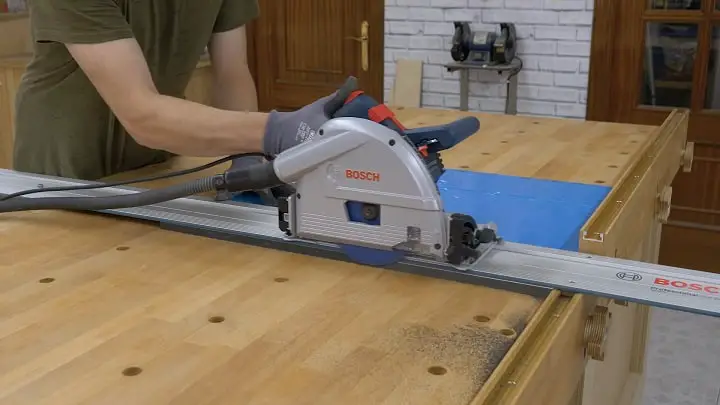
Step 4: Start Cutting
Once you have a clear plan on how you’re going to make your cut, you can switch on the unit. Try to imagine the table saw as an upside-down circular saw poking out of a table. Keeping that in mind, lock your fence to the desired measurement and begin the cut.
Carefully push your lumber forward with the blade only cutting through the marked section. You can use a push stick if you’d like. By the end of the cut, push off and pull away from the lumber without making contact with the blade.
For a cross-cut, turn your lumber so that it leans on one side against the miter gauge fence. Mark the measurements with tape or a marker and turn on the blade. Push the miter gauge so that the blade cuts along the marked section. Then take away the cut sections safely.
Just like this, keep making straight cuts until you’ve reached satisfying results.
Conclusion
Now that we’ve gone through all our info on how to use a table saw, you can already see that it’s not as difficult or dangerous as many carpenters might tell you it is. All it takes is some practice, and you’ll be used to cutting on table saws in no time. So, start sharpening your skills by trying out your table saw right away.

I'm Joost Nusselder, the founder of Tools Doctor, content marketer, and dad. I love trying out new equipment, and together with my team I've been creating in-depth blog articles since 2016 to help loyal readers with tools & crafting tips.